HOPE HOUSE FOUNDATION THRIFT SHOP
like us, follow us
  • HOME
  • DONATIONS 101
  • ABOUT
  • PHOTOS
    • PRODUCTS
    • STORE
    • STAFF
  • CONTACT
  • THE GREEN SIDE
  • VOLUNTEER
  • SALES - PROMOTIONS
  • BLOG
  • OUR CUSTOMERS
  • NEWSLETTERS

10 Creative Ways to Declutter Your Home

1/14/2015

4 Comments

 
Picture
“People rarely succeed unless they have fun in what they are doing.” —Dale Carnegie

The idea of living a simplified, uncluttered life with less stuff sounds attractive to many. They have considered the benefits of owning fewer possessions: less to clean, less debt, less to organize, less stress, more money and energy for their greatest passions. They are ready to declutter but some get quickly tripped up by the very next question… where in the world do I begin?

Many begin to feel overwhelmed, anxious, and defeated around the idea of decluttering their homes. That’s too bad. The decluttering journey doesn’t need to be as painful as some make it out to be. In fact, there are a variety of people who have come up with some pretty fun, creative ways to get started.

Consider this list of 10 creative ways to declutter your home:

1. Give yourself 5 solid minutes. Leo Babauta at Zen Habits recommends 18 different 5-minute decluttering tips. Pick one today that sounds appealing. Or better yet, pick a random number 1-18, read the specific tip, and commit 5 minutes to completing it.

2. Give away one item each day. Colleen Madsen at 365 Less Things gives away one item each day. Over the past several years, she has experienced quite a transformation simply reducing her stuff one day at a time.

3. Fill one trash bag. Early in our journey towards simplicity, one of my favorite decluttering techniques was to grab a simple large trash bag and see how quickly I could fill it. While much of what I collected was trash, this could also be used to fill a bag for Goodwill.

4. Try the Oprah Winfrey Closet Hanger Experiment. While this idea didn’t originate with Oprah, she was the one to help give it notoriety. To identify wardrobe pieces to clear out, hang all your clothes with the hangers in the reverse direction. After you wear an item, return it to the closet with the hanger facing the correct direction. After six months, you’ll have a clear picture of which clothes you can easily discard. This experiment could also be applied to a number of clutter areas in your home (cleaners, toys, linens, tools, hobbies and craft items).

5. Make a list. Dana Byers recommends creating a list of places/areas in your home to declutter beginning with the easiest… which doesn’t sound all that creative until she adds this note, “When you’re done with one area, STOP.” This list could be made as easy or difficult as you desire based upon what areas of your home make up the list (drawers/closets/rooms). And could easily fit into any schedule.

6. Take the 12-12-12 Challenge. A simple task of locating 12 items to throw away, 12 items to donate, and 12 items to be returned to their proper home can be a really fun and exciting way to quickly organize 36 things in your house. On more than one occasion, this challenge actually became a quick competition between my wife and me… and your kids don’t have to be too old to participate as well.

7. Change your perspective. Unclutterer offers a powerful approach to decluttering when they offer a number of strategies to help you change your perspective and begin to notice some clutter you may have missed. Among their ideas: take photos of your house, invite over a toddler, or ask the boss to meet in your office. With all of the examples, the hope is to cause you to see your home in a new light.

8. Experiment with numbers. For example, Courtney Carver invented Project 333 to challenge people to wear only 33 articles of clothing for 3 months. If 33 articles of clothing seems too little, adjust the rules as you need by picking a new number. The important thing is to challenge yourself to live with less and see what you learn from the experiment.

9. Use your imagination. Psychology Today recommends using your imagination to help declutter objects that may seem difficult to remove. Try asking yourself unique questions like, “If I was just buying this now, how much would I pay?” These creative techniques may prove to be very helpful for some with difficulties removing unneeded clutter.

10.The Four-Box Method. As we first set out on our journey to minimalism, this was the technique most often used in our home. As I set out to declutter an area, I brought four boxes: trash, give away, keep, or relocate. Each item in every room was placed into one of the four categories. No item was passed over. Each was considered individually. Some projects took an hour… others took days or weeks. But the technique and principles remained the same.

No matter what you choose to help you get started – whether it be one of these ten or one of countless others – the goal is to take your first step with excitement behind it. There is a beautiful world of freedom and fresh breath hiding behind that clutter. How you remove it is up to you.

Source:
http://www.becomingminimalist.com/creative-ways-to-declutter/

4 Comments

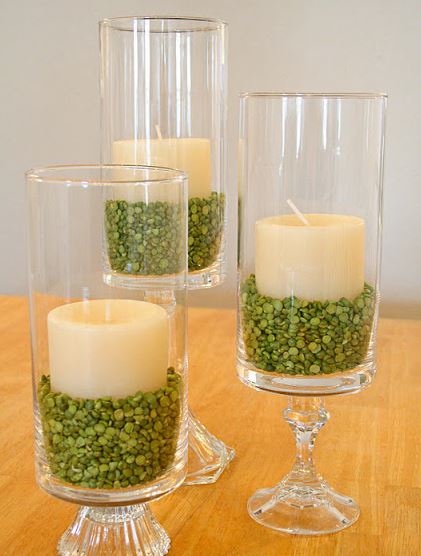
Thrifty DIY Project: Hurricane Vases

7/9/2014

0 Comments

 
Picture
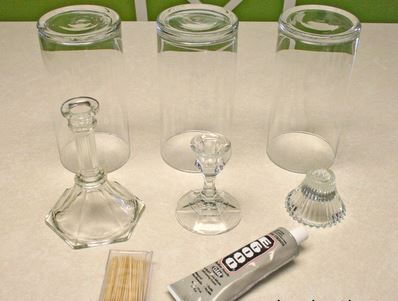
SUPPLIES
3 vases or large drinking glasses easily found at the Hope House Thrift Store.
3 candlesticks–also easily found at the Hope House Thrift Store
E6000 glue or Gorilla Glue
Toothpicks

DIRECTIONS
First  wash and dry the vases and candlesticks.
Then, apply the glue into the rim of the candlesticks with a toothpick.
Next put the vases on top of the candlesticks and apply some pressure.
Let them set for a little bit, maybe with a book placed  on top to maintain pressure.
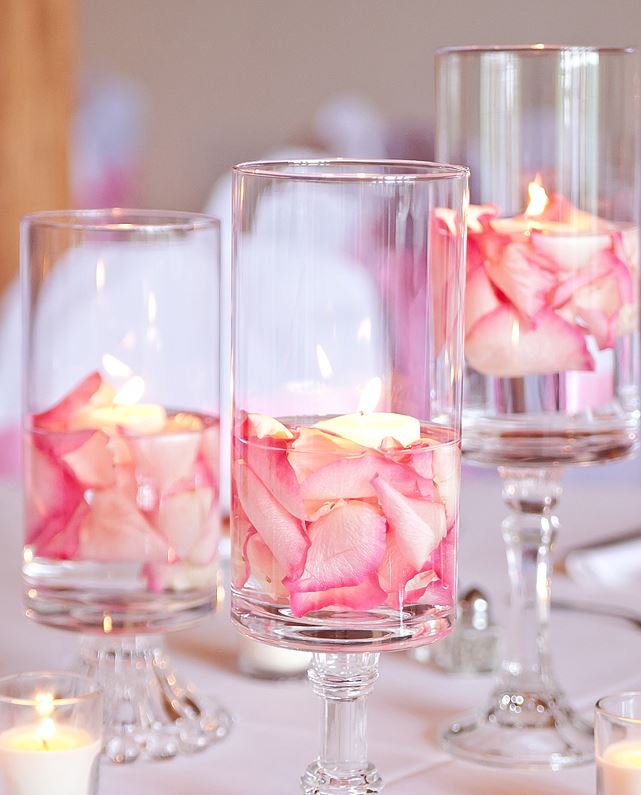
Finally you can put some lentils in the vases and add the candles. Or you can add water, rose petals and floating candles.
Picture
Picture
From the blog "TwoTwentyOne".net
0 Comments

Give Your Stuff Away Day

1/11/2014

0 Comments


De-clutter your life, while also shrinking landfills and giving to a worthy cause!

Take your unwanted items to the Hope House Thrift Store!


100% of the revenue from the Hope House Foundation Thrift Shop supports people with disabilities in our community.

Picture
0 Comments

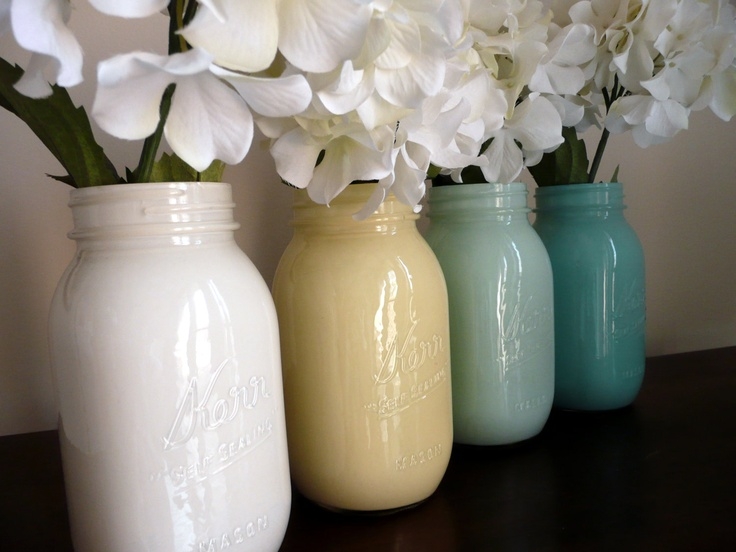
DIY Project: Mason Jar Decor Ideas

8/4/2013

4 Comments

 
Find Mason jars at the thrift store and have fun....
Picture
Pour some acrylic paint (the one sold in bottles for crafts) in the jar, and start  twisting the jar around, coating the whole inside,
Picture
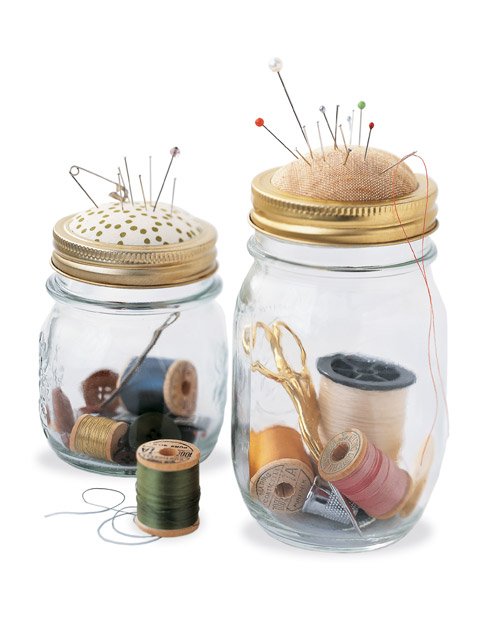
Instructions for this project may be found here:  http://www.marthastewart.com/272417/sewing-kit-in-a-jar
Picture
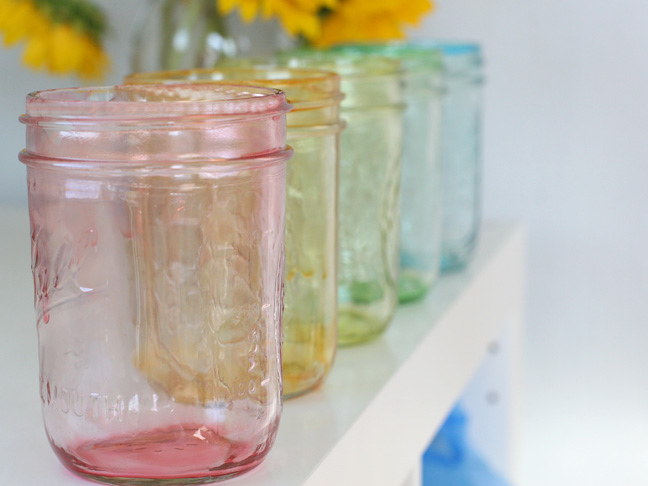
To create these colorful jar, follow this link: http://www.momtastic.com/diy/168908-diy-tinted-mason-jars-in-rainbow
Picture
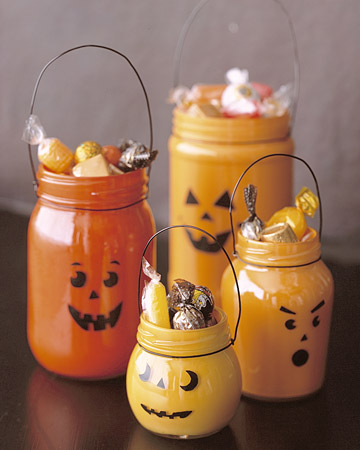
Jar-o-lanterns.
Instructions here:    http://www.marthastewart.com/264230/jar-o-lanterns
Picture
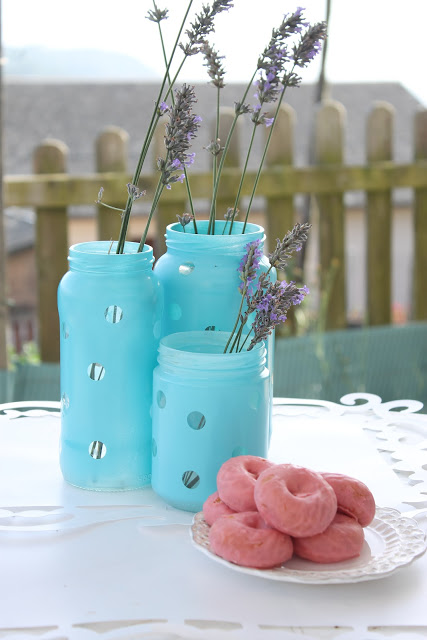
The instructions for these polka dots jars are in Spanish, but the many photos are very helpful for understanding how to complete. Go here:  http://www.boulevardpinki.com/2012/07/diy-casa-jarrones-de-lunares.html
Picture
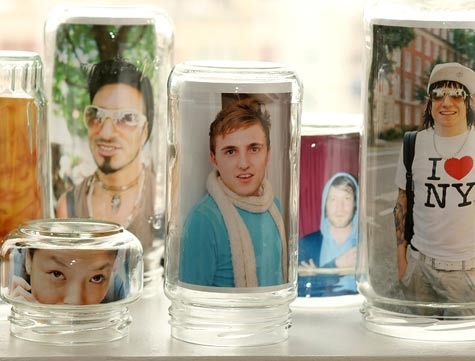
Use Them as Picture Frames
Picture
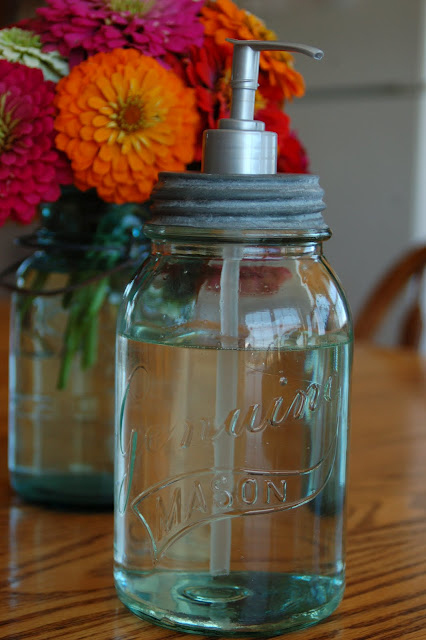
Make a Soap Dispenser.
Instructions here:  http://www.theblissfullycontentlife.org/2010/08/homemade-christmas-canning-jar-soap.html
Picture
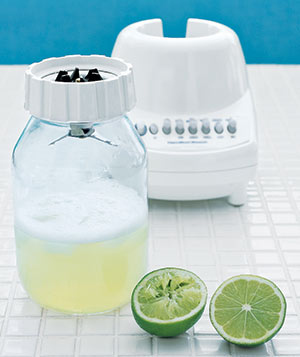
Replace a Busted Blender Jar. Many detachable blade assemblies screw right onto a mayo jar or a small-mouth Mason jar.
4 Comments

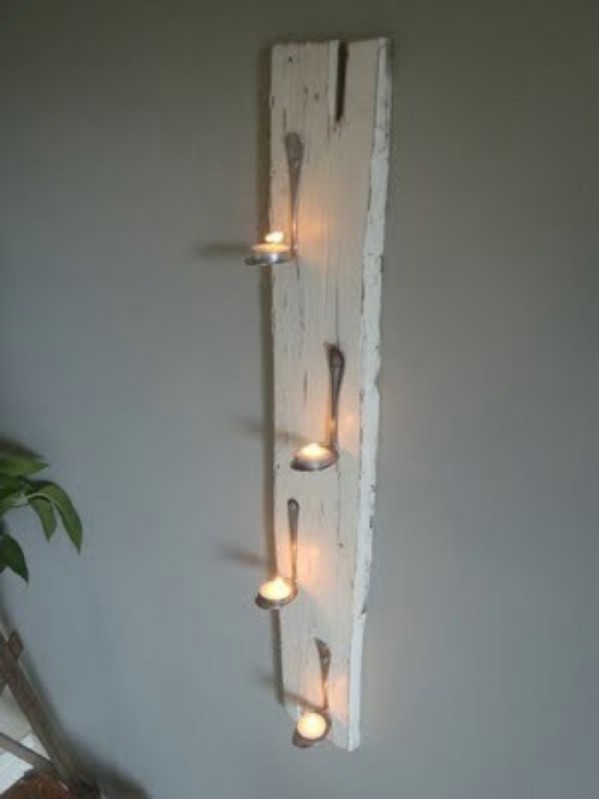
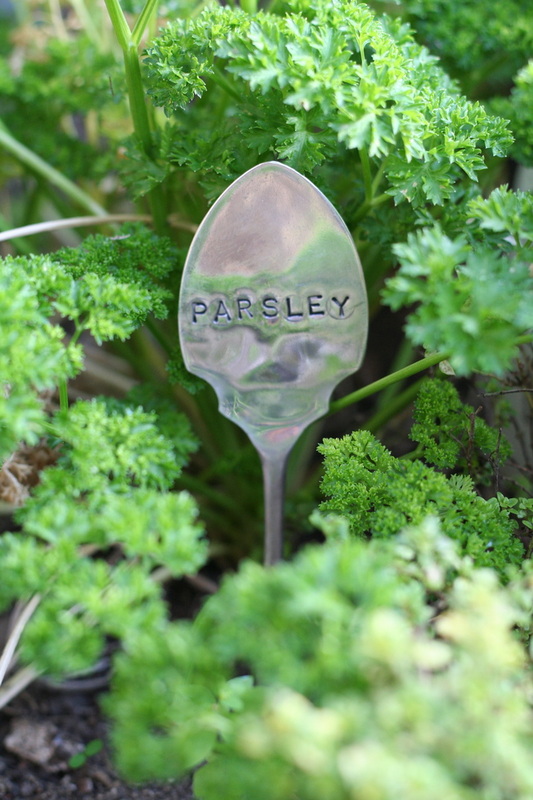
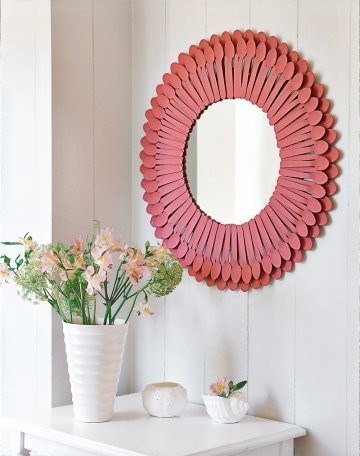
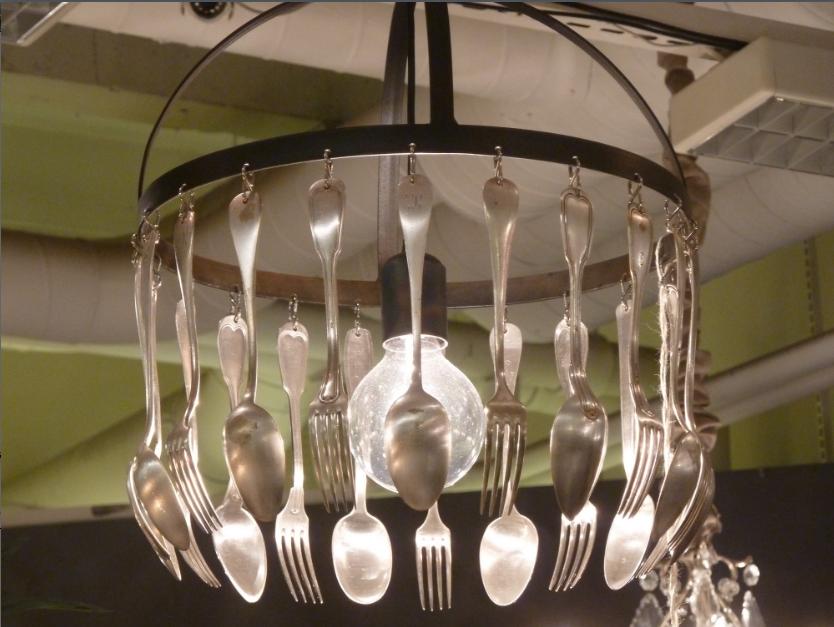
DIY Project of the Week: Re-purposing Spoons

7/27/2013

2 Comments

 
Picture
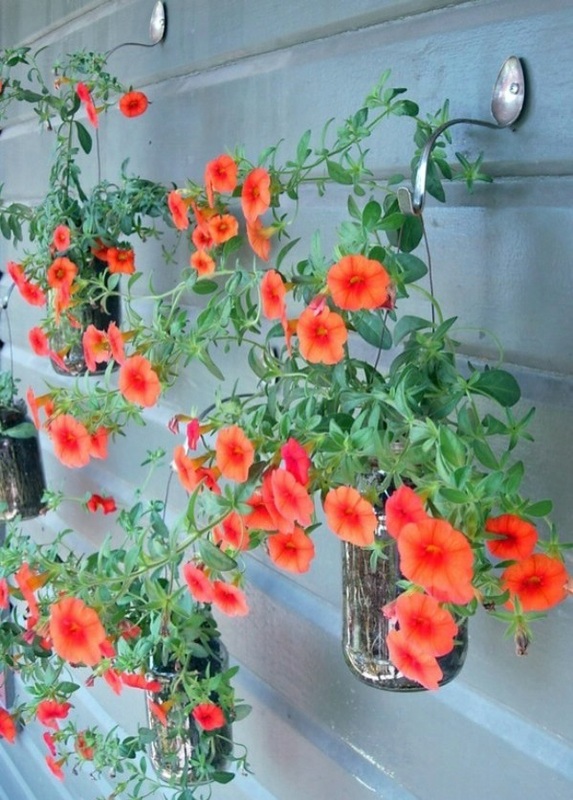
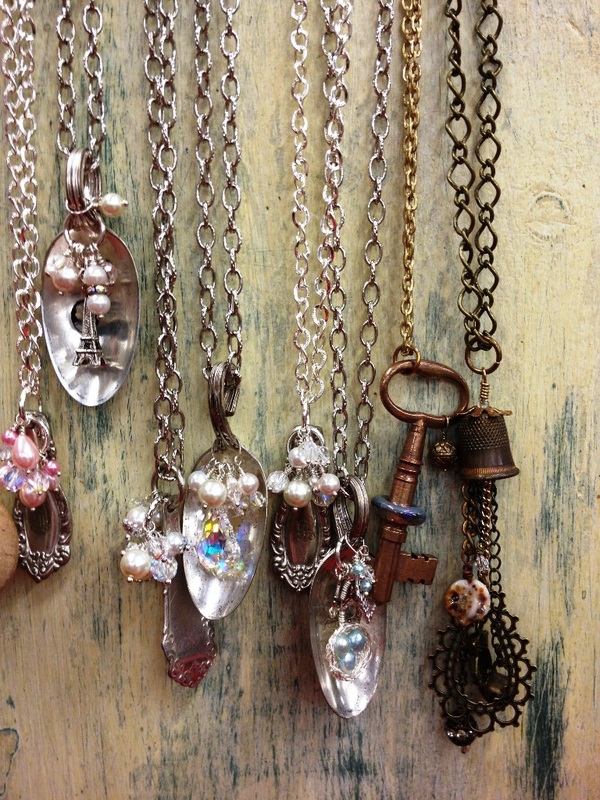
You can create garden hooks for hanging indoor or outdoor plants by using your old spoons. Just bend them and flatten the spoons, then simply put them wherever you want to hang a planter. Use smaller spoons for the small plants and larger spoons or ladles for larger plants.
Picture
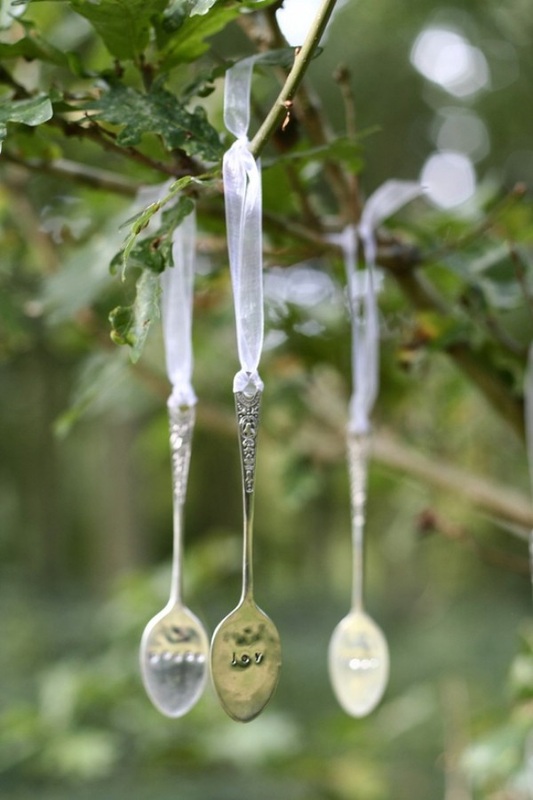
Decorative spoons make wonderfully unique Christmas ornaments. Simply hot glue ribbon to the handle of each one and hang them on your tree. This is an excellent idea for first baby spoons and you can have a special ornament on your tree for every child in your home. These are very inexpensive and very easy to make and will help you to create a stunning Christmas tree display and one that is very personal.
Picture
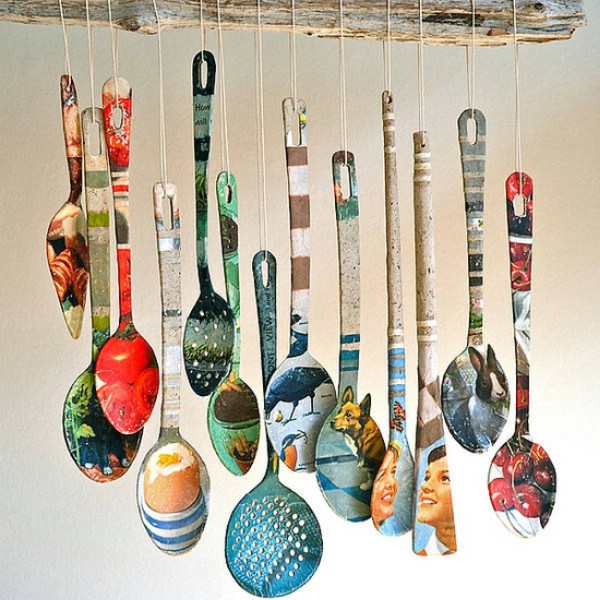
Since spoons technically belong in the kitchen, why not turn those old spoons into lovely decor that you can hang in the kitchen? Just choose a collection of spoons of all different sizes, paint them however you want and hang them in your kitchen area. For a really unique country look, tie them all up with twine and hang them from an old board. They look beautiful and you can customize them anyway you want when you are painting them.
Picture
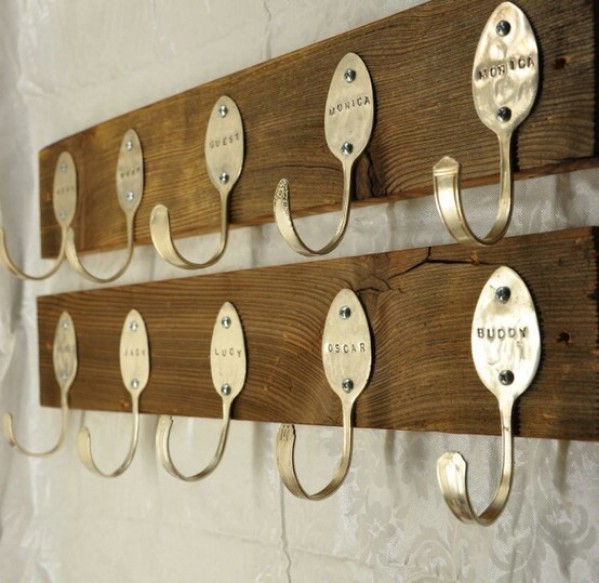
This one is a bit more complicated but definitely worth it. You will need a relatively large board, however long you want your coat hook. Just flatten the spoons out, bend up the ends of the handles and affix them to the board with screws. You can use spoons that all match or mix it up a bit to make it really unique. If you want, you can even have the spoons personalized before you affix them with the names of everyone in your home.
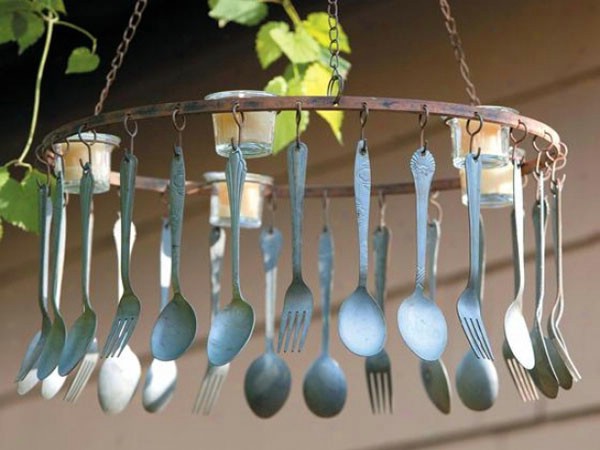
And here few more ideas....
Picture
Picture
Picture
Picture
Picture
Picture
2 Comments

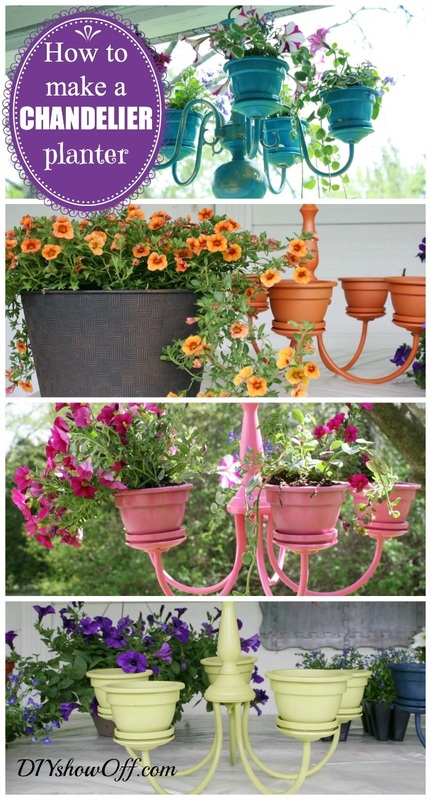
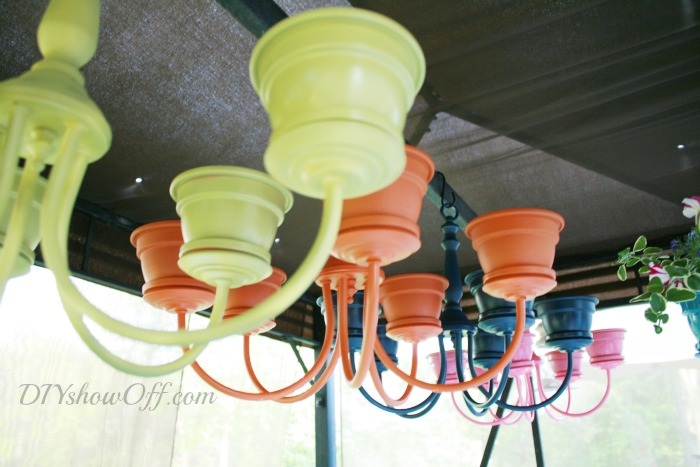
DIY Project f the Week: Chandelier Planter

7/21/2013

2 Comments

 
Picture
Materials:

  • Chandelier (try our thrift store)
  • Terra cotta pots and saucers (The same number as the “arms” of your chandelier. Ours all had 5.)
  • Outdoor-rated spray paint
  • Waterproof glue 
  • Plumber’s epoxy putty
  • Flowers, plants
  • Moisture Control Potting Mix
  • “S” hook for hanging (and the chain that comes with the chandelier if needed)
Tools:

  • Wire cutters
  • Garden trowel
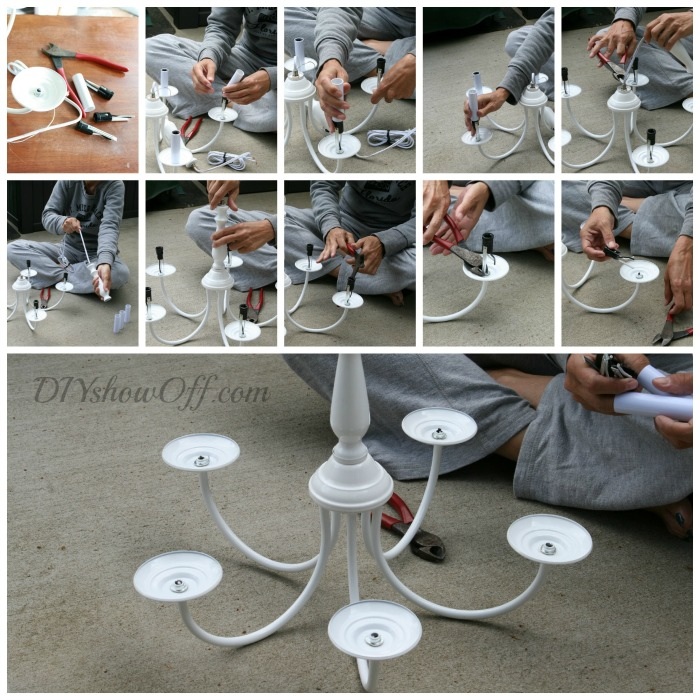
1. Slide off the plastic ‘candle’ holders and remove all electrical/wiring from the chandelier using the wire cutters.


Picture
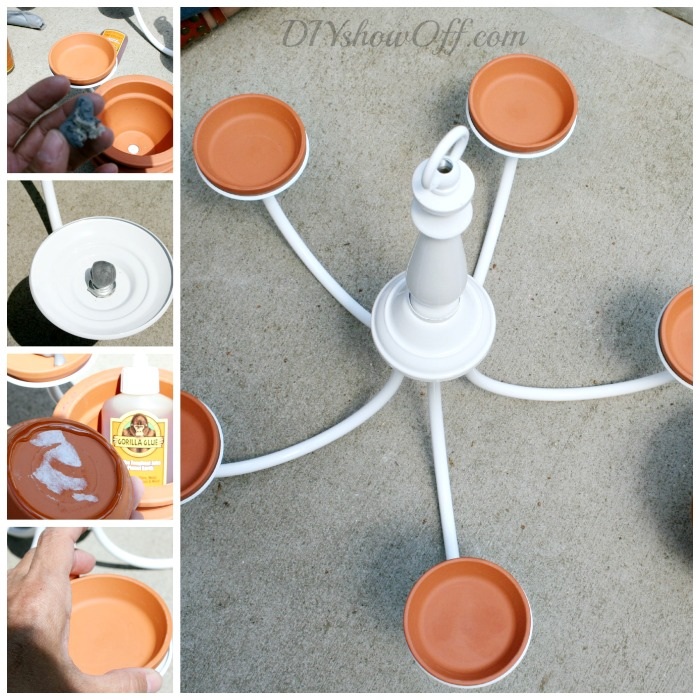
2. Attach terra cotta saucers using epoxy putty and glue. The epoxy putty helped to keep the things in place since clamping isn’t possible.


Picture
Repeat for attaching the pots. I let the glue dry 1-2 hours before spray painting and allowed it to cure several days before planting.


Picture
3. Spray paint the entire thing (even your chain if you’ll be using it). I found that hanging the chandelier from a low tree branch to be the easiest process (especially if the chandelier’s shape doesn’t sit level) but you could also do a 2 step process (position upside down on drop cloth/cardboard, spray paint, dry, flip and the spray from top and let dry). Some parts of the chandelier’s design may also be removable (simply unscrew) and can be taken apart for spray painting if needed. Wear a mask if you’re working under poorly ventilated conditions or breezy weather and eye protection.
Let dry for 24-48 hours.


Picture
Plant!


From  diyshowoff.com
2 Comments

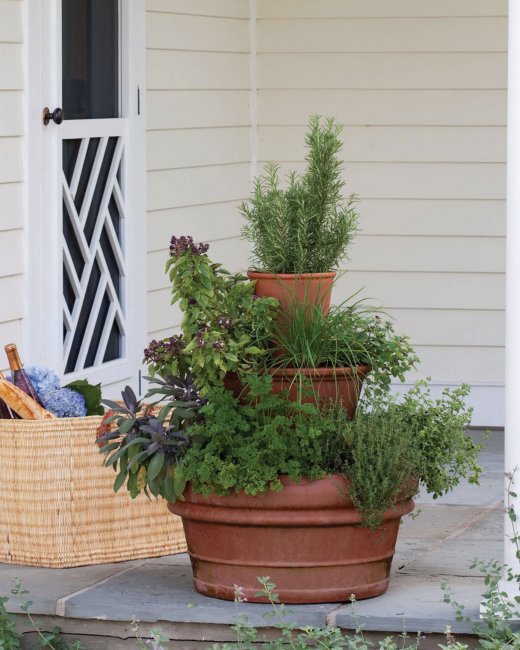
DIY Project of the Week: Stacked Herb Garden

7/13/2013

0 Comments

 
Don't miss out on fresh herbs (or pay a lot for them at the market) just because you don't have a big yard. Situate this compact herb garden in a sunny spot near the kitchen door for easy snipping.


Picture
Materials
  • 5 terra-cotta planters
  • Soilless potting mix
  • Assorted herbs

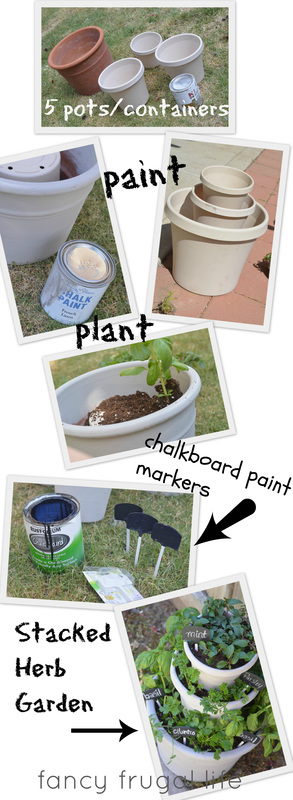
 You can find used pots at the Thrift Store. You can substitute the two pots that will be placed upside down with any other conteiner, like a paint can, for example. If you  want your pots to be the same color, you can paint them.

Steps
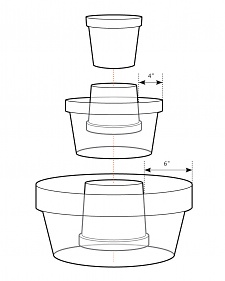
  1. Place largest planter in the location selected for the herb garden. Center 1 smaller pot within, upside down (with at least 6 inches of space around the inverted pot); an empty paint pint would work fine, if you dont' want to use a pot;  fill ring between the two with potting mix.
  2. Repeat to create a second layer with 2 smaller pots, with 4 inches between them. Place final pot right side up on second inverted pot. Fill with potting mix. Plant herbs in all three layers.


Picture
Picture
http://fancyfrugallife.com
0 Comments

DIY Project of the Week: Memory Jar

7/8/2013

0 Comments

 
Picture
Picture
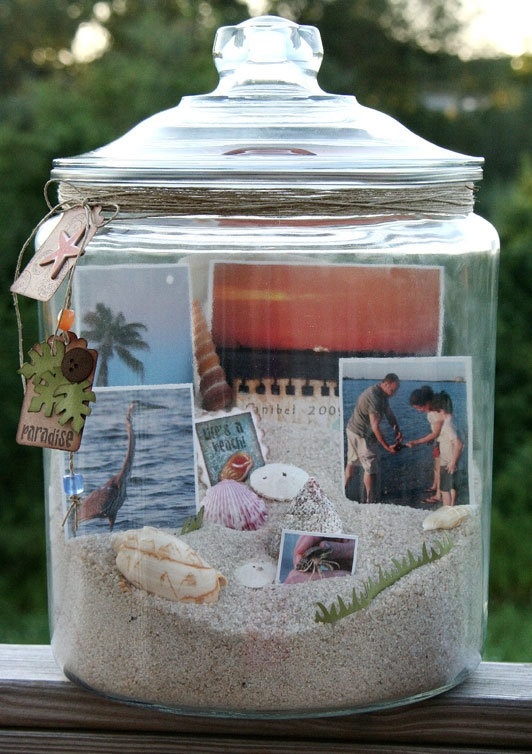
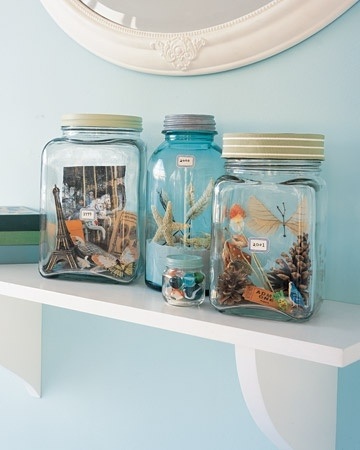
Find a glass jar at the thrift store. Place little mementos, photos, souvenirs, etc in it.
Display in your home to bring back pleasant memories of your vacation, trip, or any special moment you want to remember.
0 Comments

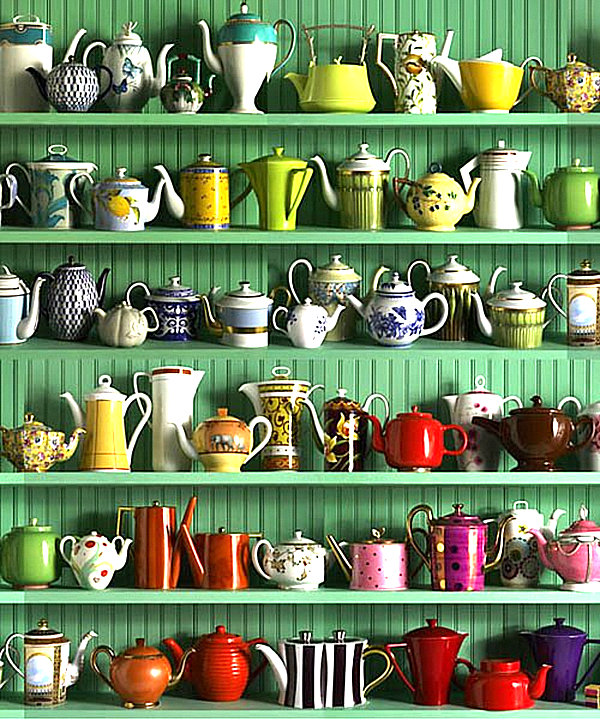
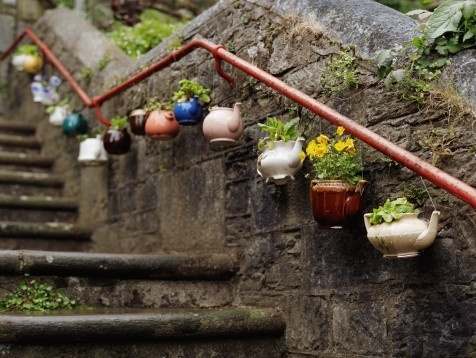
DIY Project of the Week: Turn teapots into decorations

6/30/2013

4 Comments

 
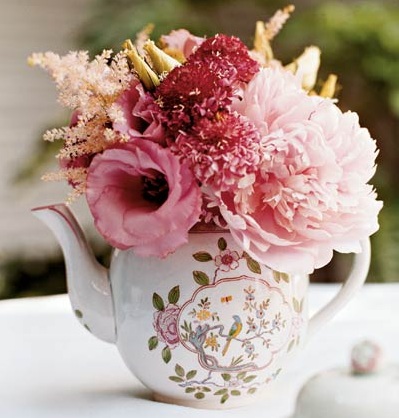
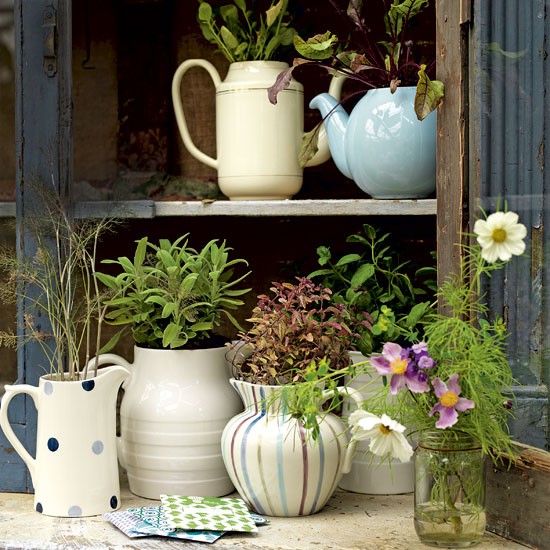
Number one hint for decorating with teapots: collect a whole lot of them!… find them at the Hope House Thrift Store, for example.
You can never have too many teapots…

Here are some eye-catching ideas 
…

Picture
Picture
Picture
Picture
decoratingmumma. com
4 Comments

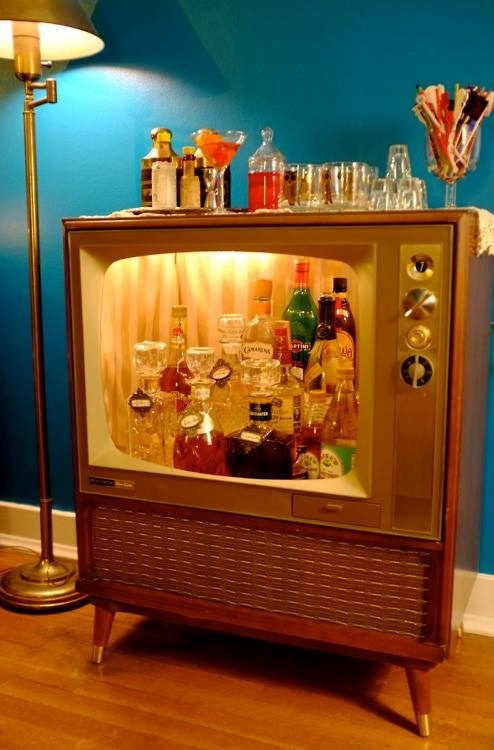
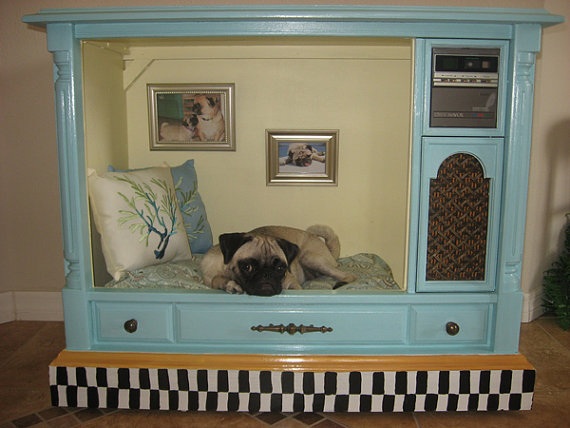
DYI Project of the Week: Turn a vintage console TV into a bar or a.... pet bed

6/23/2013

3 Comments

 
Picture
Picture
3 Comments

    Categories

    All
    Articles
    Comments
    Compliments
    Customers
    Events
    Friend
    Newsletters
    Projects
    Sales
    Special Sales

    RSS Feed

    Archives

    October 2015
    March 2015
    January 2015
    July 2014
    June 2014
    May 2014
    April 2014
    March 2014
    February 2014
    January 2014
    August 2013
    July 2013
    June 2013
    November 2012
    February 2012
    September 2011

Powered by Create your own unique website with customizable templates.